Calf strength and ankle mobility are crucial for all athletes but particularly runners. When your foot strikes the ground, the functional stability of the whole kinetic chain relies on a strong and agile base. Yet calf muscle exercises are often missing from training routines.
“The whole complex needs to work together all the way up the totem pole,” says Nicole Haas, a board-certified orthopedic clinical specialist with a doctorate in physical therapy. If you have stiff ankles or calves, or significant lower-leg asymmetries, that could reverberate up the limb and cause pain in the knees, hips, and back, as well as limit your performance.
Along with the quads, the calves absorb the most impact when your feet land, whether you’re dropping a cliff on skis or pounding pavement. The calf muscle group is mainly comprised of the gastrocnemius and soleus muscles, which both connect to the Achilles tendon, on the back side of the lower leg. Your calves help bend your knees and are responsible for lifting the heel, a movement called plantar flexion (think of toeing when rock climbing). They also control the opposite movement, dorsiflexion, while they’re elongated. “Eccentric loading [when muscles elongate under load] imposes the highest forces on a muscle,” says Scott Johnston, coauthor of Training for the Uphill Athlete: A Manual for Mountain Runners and Ski Mountaineers. “It’s the primary load that runners experience in their legs—and the reason you get sore calves and quads when you run downhill for 2,000 feet.”
There’s no one-size-fits-all training plan to build strength and resilience in the lower legs. Assess your general calf strength and ankle mobility—there’ s a helpful guide below—before you jump into the exercise progression, and don’t neglect the recovery moves.
Strength and Mobility Assessments
Single-Leg Heel Raise
What it does: Assesses your concentric calf strength.
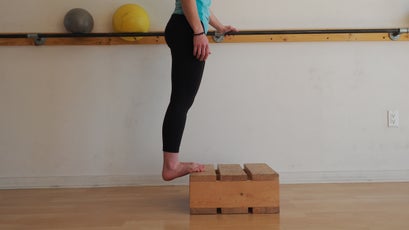
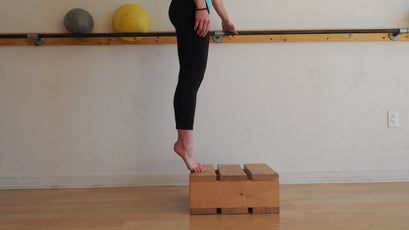
How to do it: Stand barefoot on the balls of your feet with your heels hanging off a step. Hold on to a wall or doorframe for balance if necessary, but don’t use your hands for upward assistance. Lift one leg off the ground, and perform single-leg heel raises, also known as calf lifts, with the other. Move through a complete range of motion, from as low as you can go to as high as you can go. Try to do as many as you can with a full range of motion. Repeat on the other leg.
If you can perform ten or more single-leg heel raises with a full range of motion, you have adequate calf base strength—for an endurance athlete—and can skip ahead to more sport-specific training (see the Jump Rope exercise, below).
But if fatigue sets in and you start to lose your range of motion before ten complete repetitions—perhaps, after three or four reps, you can only lift your heel a couple of inches—you’re probably deficient in calf strength. If that’s the case, it’s time to get stronger! Follow the exercise progression below, starting with double-leg heel raises, twice a week for three weeks, then retest yourself. If you can now do ten or more single-leg heel raises with a full range of motion, you’re ready to move on to sport-specific training, but if not, continue working on your general concentric calf strength until you can.
Weight-Bearing Lunge Test (Knee-to-Wall Test)
What it does: Assesses your ankle-joint mobility (dorsiflexion range) and symmetry.
How to do it: If you have a restriction, or stiffness, in one or both ankles, this can cause plantar fasciitis or problems in your calves, knees, hips, and back. You can do this simple test to assess your ankle-joint mobility at home.
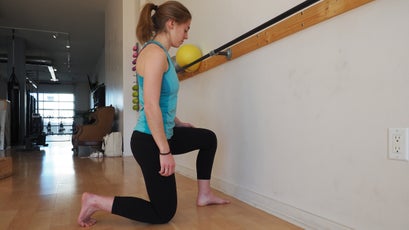
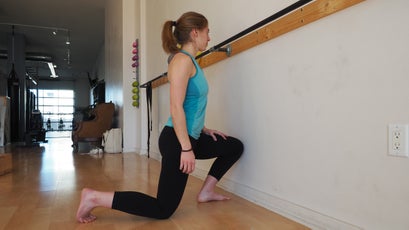
With your toes facing a wall, place one foot roughly a hand width away. Keeping your heel flat on the ground, bend your knee as if you were lunging into the wall. If your knee cannot touch the wall without your heel lifting, move it closer and try again. If your knee easily touches the wall, move your foot back and repeat. The idea is to find the distance where your knee can just barely touch the wall without your heel lifting. This is your dorsiflexion range.
When you find this point, measure the distance between your big toe and the wall. (If the wall has a baseboard, account for its width in your measurement.) Repeat with the other leg. A distance of five or more inches is considered a normal range of motion; anything less and you should add the Ankle Mobilization with Movement exercise, below, into your routine. Symmetry across your ankles is another key. If one ankle is stiffer than the other, you should work on ankle mobility until they’re even. If you have a good range of motion that’s symmetrical across your ankles, the Ankle Mobilization with Movement exercise isn’t necessary.
Calf Muscle Exercises
Double-Leg Heel Raise
What it does: Builds concentric calf strength (only necessary if you cannot do ten or more single-leg heel raises with a full range of motion).
How to do it: As with the assessment test, stand barefoot on the balls of your feet with your heels hanging off a step. Perform full-range-of-motion heel raises (with both legs) for four or five sets of six to ten repetitions, with a minute rest between each set.
“Don’t go until failure,” says Johnston. The purpose of this exercise isn’t to increase the size of the muscle but to increase its strength, which means you don’t need to max out.
Once you can do ten to twelve reps comfortably, progress to the next exercise.
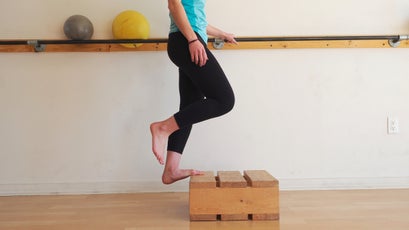
Heel-Raise Progression (Two Legs Up, One Leg Down)
What it does: Builds eccentric calf strength.
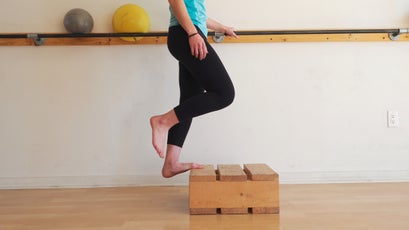
How to do it: Continue with heel raises, but now use both calves to rise up, then lift one leg off the ground and lower the other leg slowly for three to four seconds. Like before, perform four or five sets of six to ten repetitions on each leg, with a minute rest between each set.
Once this exercise begins to feel easy, retest yourself on the single-leg heel raises. If now you can do ten to twelve (or more) single-leg heel raises with a full range of motion, you’re ready to move on to the sport-specific exercise below. If not, continue with this exercise.
Jump Rope
Only begin this exercise if you have developed enough general strength to complete ten or more single-leg heel raises with a full range of motion (see above test).
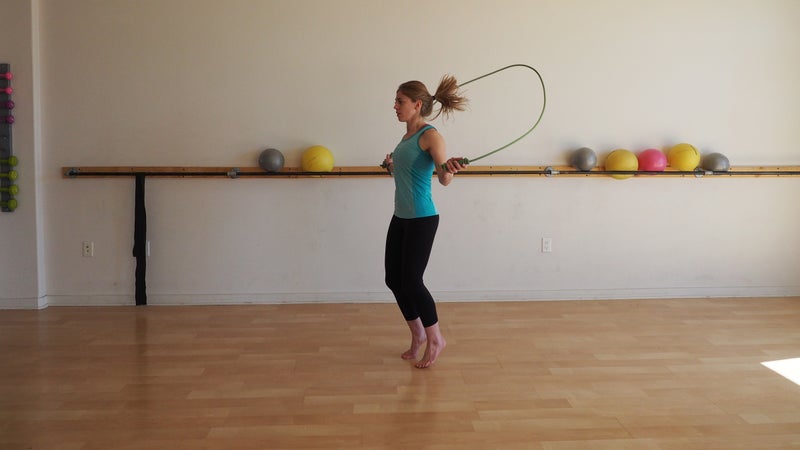
What it does: Loads the calves eccentrically and increases sport-specific muscular endurance.
How to do it: Simply jump rope. Begin with four sets of 15 seconds, progress to six to eight sets of 30 seconds, and eventually plan on doing ten sets of 60 seconds, with a minute rest between each set of jumping. Remember to land on your toes, not flat-footed.
Note: You don’t need a jump rope for this exercise—you can jump up and down on your toes in place—but a jump rope adds discipline and keeps you honest.
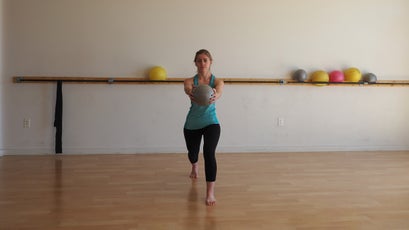
Walking Lunges with Windmill
What it does: Trains multidirectional, functional stability in the foot and ankle.
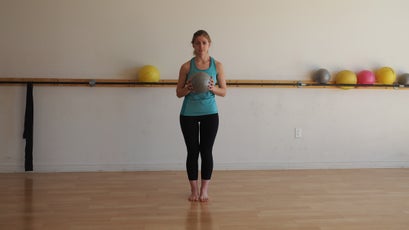
How to do it: Perform this exercise simultaneously with the calf-training progression. Stand upright with your feet together, holding a two-to-three-pound weight. Step forward with one foot as you reach your arms forward, and slowly lower into a lunge. (Keep your knee behind your toes on the front leg, and be mindful that your knees don’t collapse inward as you move because both patterns are correlated with knee pain.) Rotate your torso slowly to each side while maintaining a straight leg alignment. Then step forward with the trailing leg to bring your feet together again. Repeat with the other leg in front. Haas stresses the importance of focusing on proper mechanics—quality of form rather than quantity—before you build up the number of repetitions. “Train the pattern you want,” she says, “not the one that is the easiest.” Five or six repetitions on each leg is a good starting point.
Recovery
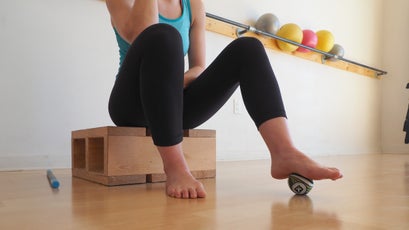
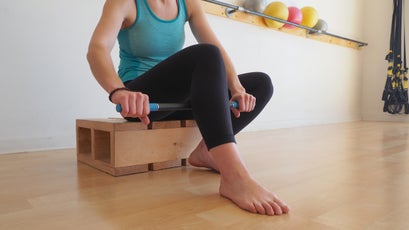
Roll Out
What it does: Myofascial release flushes tension in muscles and connective tissue to improve mobility and reduce inflammation created during exercise.
How to do it: After a workout session or day in the mountains, use a lacrosse ball or myofascial-release tool (Haas recommends the Rad Roller) to roll out the soles of your feet (plantar fascia), then work your way up the kinetic chain. Focus on your Achilles, calf muscles, and the muscle on the outside of your shin (anterior tibialis). Avoid rolling over any knobby bits or boney protrusions, since that’s often where sensitive connective tissue anchors and nerves hide, too. Spend a couple minutes on each leg to loosen tight tissues. You can also use a foam roller or massage stick.
“More is not better, as far as force,” Haas says. Too much pressure can trigger a fight-or-flight sympathetic response. If you feel pain, your brain can interpret that as a problem and involuntarily tighten those structures in an attempt to protect them. Gradually increase the pressure until it’s firm but not painful.
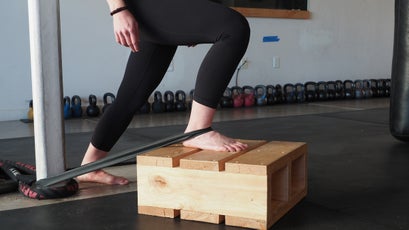
Ankle Mobilization with Movement
What it does: Improves ankle-joint mobility (dorsiflexion range).
How to do it: If you have an adequate and symmetrical range of motion in both ankles, you can skip this exercise. But if you have a restriction in one or both of your ankles, perform the following exercise. (Use the Weight-Bearing Lunge Test, described above, to gauge your ankle mobility.)
Girth-hitch an elastic band to an anchor at ground level, and stand facing away from the anchor. Loop the other end of the band over one foot so that it sits in the crease of your ankle, below your ankle bones. With that foot, step forward to create moderate tension in the band. Gently drive your knee forward and over your toes in a straight line, pause, then return to the starting position. This results in a posterior glide of the talus bone—the joint mechanics necessary for dorsiflexion. Hold the tension for a few seconds, then slowly return to the starting position. If your range of motion is really bad, Haas suggests placing your active foot on a box to improve gliding during the mobilization. Complete ten repetitions on each side, once daily (ideally after exercise or on its own, but not right before activity until you build stability around the new joint mobility). You should not have pain during this exercise.
Calf Stretch and Ankle Mobility
What it does: Lengthens the calf muscles and increases ankle and lower-leg mobility.
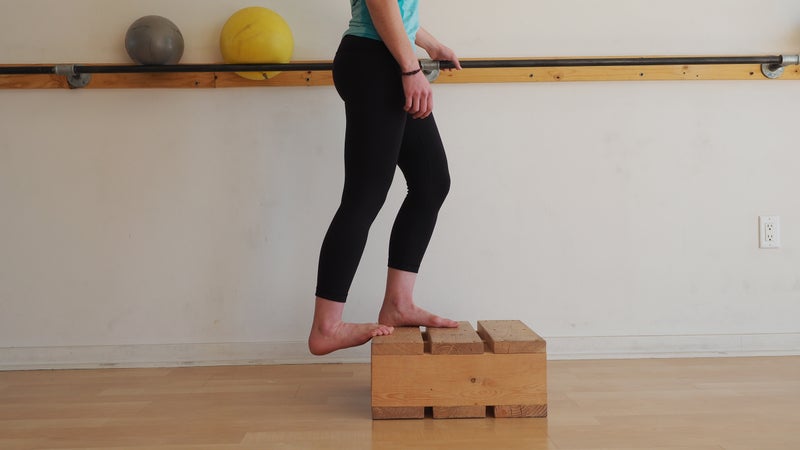
How to do it: Place the ball of your foot on the edge of a step, and lower your heel to gently sink into a calf stretch. Make sure you can relax into the position to optimize your tissue’s ability to let go. (Use your other leg as support to ease into the stretch.) Hold the tension for 30 seconds, then repeat on the other leg. Haas adds that the key to incorporating an ankle-joint glide while stretching is having your toes upward (or heel downward) as opposed to your foot flat on the floor where this can get missed. If you’re outside, use rocks, tree roots, a curb, or even your other shoe to achieve the stretch.
Source link

