

Moving your bike indoors for the winter can feel uninspiring. There’s no scenery to gaze at, no cycling crew to keep you company, and no changes in terrain to keep things interesting. But there’s also less time spent layering up, fewer frozen fingers, and no junk miles commuting from home to your starting point.
Instead of thinking of indoor riding as a necessary evil during the winter months, consider the benefits: You don’t have to worry about slipping on ice or navigating around cars, pedestrians, and pets. You can adjust the temperature indoors, making it warmer to mimic summer races or turning on a fan if you need to cool off. With fewer distractions and more control over your environment, you can get really dialed in with your training.
While outdoor cycling allows you to practice bike handling and climbing and descending hills, indoor training is great for honing your pedaling efficiency and cadence.
How to Choose Indoor Cycling Equipment
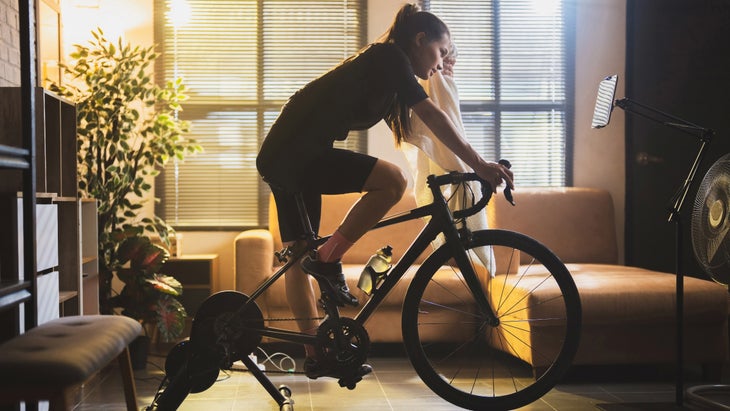
There’s no match for your own bike, especially if it’s been fitted to your body and has a seat you can comfortably sit on for hours. If you want to keep riding the same bike indoors, you can mount it on a bike trainer or rollers.
Bike trainers fall into two main categories: wheel-on and direct-drive. A wheel-on trainer attaches to your bike’s rear wheel and uses a metal roller pressed against the tire to add resistance. With a direct-drive trainer, you remove your rear wheel and set your bike on the trainer’s cassette. Wheel-on trainers can quickly wear out your back tire, but they also tend to be more affordable; direct-drive trainers, which are larger and heavier, provide a smoother ride.
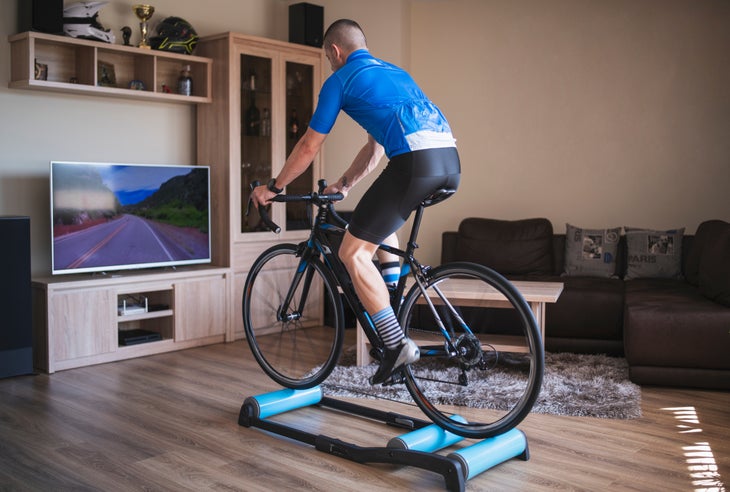
Rollers sit flat on the floor and include three long cylinders attached to a metal frame. While you ride, your wheels spin the cylinders, offering a realistic road-feel. This apparatus requires more balance and skill to stay upright than other indoor cycling options.
While it won’t replicate your outdoor riding experience as closely, Matt Wilpers, a coach and training specialist with Peloton, says a stationary bike can also help you build your overall endurance. “When you’re focusing on general fitness, just getting on a bike and pedaling is like 90 percent of the battle,” he says.
Unlike devices that attach to your normal bike, a stationary bike is a separate piece of equipment specifically meant for cycling indoors. Your pedal strokes spin a flywheel at the front of the machine. Depending on the model you’re using, you can turn a knob or pull a lever to adjust your level of resistance. There are a few different types of stationary bikes, including upright (which most closely resembles a regular bike), recumbent (with a reclined seat), and dual-action (the handlebars move back and forth, offering an additional upper body workout). Upright and dual-action bikes will feel most similar to your outdoor bike, but if you have back pain, the reclined seat of a recumbent bike offers more comfort and support.
Set a Goal
When your outdoor cycling season ends, Wilpers says that’s the time to set your goals for the coming year. “It puts a flag in the ground to say, ‘OK I need to be ready for this,’” he says. “It gives purpose to your workouts.”
If there’s a bike race on your calendar, plan your training program around your main race (your “A” race). Think about where you want your fitness to be by that race, and work backwards to where you are now. You’ll want to start your first phase of training about six months before race day. If your aim is to simply ride more, or be able to ride a certain distance, there’s still value in sticking to a structured training program to stay motivated.
“The difference between training and exercising is simply having a goal, and I think you need to have your goal in mind to really start getting the most out of your training,” says Wilpers. “That makes you less likely to miss a training day and more likely to have a higher quality session.”
Focus on Technique
While training indoors, pay attention to where you’re feeling the work of pedaling. You should primarily be using the big muscles of your glutes, quads, and hamstrings, rather than smaller muscles like your calves. If you’re feeling it in your knees, that could be a sign that you’re “just mashing the pedals,” Wilpers says.
While your legs power your pedals, your core is responsible for keeping the other half of your body upright and balanced on two wheels. Activate your core to control your hips in the saddle and avoid bouncing or rocking when you’re riding at a higher speed, Wilpers says. You should also be drawing on your core strength and stability to initiate your pedal stroke and take some of your upper body weight off of your handlebars.
Warm Up
Regardless of your training phase, Wilpers recommends a five-minute warmup that starts with an easy pedal for about a minute. Follow that with three to four minutes of spin-ups for 30 seconds on and 30 seconds off of building to a higher and higher cadence, then slowly backing down. “Being able to quickly turn over the pedals and apply force to the pedals is what makes a cyclist fast,” says Wilpers.
You can also add in some single-leg pedaling drills, which can help identify and correct power imbalances. Unclip one foot from your pedal and pedal with one leg, paying attention to any spots where you lose power. Start with one minute on each leg.
Indoor Training Phases
To best prepare for spring and summer rides, your training cycle should have two phases: base (which begins about six months before a goal race) and build (which starts about 12 to 16 weeks before your goal race). During base training, your focus will be on increasing your aerobic fitness and endurance as well as pedal stroke efficiency. The build phase “relies on a strong aerobic engine and foundation built in the base phase,” says Wilpers. In this phase, the volume and intensity will increase.
Base Training
During base training, which should last about six to 12 weeks, you’ll focus on upping your fitness and overall cardiovascular capacity. Wilpers suggests aiming for three workouts a week. You can sub out one ride a week with other endurance exercises, like running or swimming.
“If you’re in base training, everything needs to be endurance,” says Wilpers. That doesn’t mean purely long, slow distance rides though. While one ride a week should be your long ride, the others should include high-intensity interval training. Those rides, which can be kept to about an hour, should include several intervals around eight minutes long (you can build up to 15-minute intervals) which feel like a seven on the one-to-ten scale of rate of perceived exertion (RPE).
You can throw in some sweet-spot training as well, which helps increase your aerobic capacity. This entails riding at about 88 to 94 percent of your functional threshold power (FTP), or the maximum amount of power you can sustain for an hour at a time. Start with four eight-minute intervals or two 15-minute intervals, resting four minutes or seven minutes between each interval. These intervals should also feel like about a seven in terms of your rate of perceived exertion.
“Sweet-spot training is considered one of the most beneficial intensities to train at to start bumping up your FTP,” says Wilpers. “I like using sweet-spot training at the tail end of base training because you are starting to get hungry for more intensity…but it’s not yet time to make that jump into the build phase.”
During the base phase, recovery is particularly important to ensure you don’t get injured or burn out before your training can really begin. As you get older, Wilpers says, it becomes more challenging for your body to absorb the work you’re doing and adapt to training intensity.
Build Training
Your build phase should start about 12 to 16 weeks before your goal race and last around six to eight weeks. Aim for two to three 60- to 90-minute long high-intensity workouts per week, in addition to your longer endurance ride. During this phase, you’re bumping up the volume and intensity. VO2 Max intervals—riding in a zone five level of intensity, where your heart rate is at about 90 to 100 percent of your max—should be around five minutes. Threshold intervals—in which you’re riding at the highest level of power you can sustain on an hour-long ride—should be about eight to ten minutes with recovery between intervals at about half the time spent working. Aim for an RPE between seven and eight.
Training should start getting more race-specific as well. Consider the elevation of the course and add hills accordingly, and increase long rides to get closer to the amount of time you anticipate riding during your peak race.
The Pillars of Off-Season Training
Frequency: Find a schedule you can stick to. How much time can you realistically devote to training? “If you over-schedule yourself and you can’t stay consistent, nothing is going to happen,” Wilpers says. “You’re just going to get frustrated.” Three sessions a week is ideal, but during your base phase, you can swap one of those for another kind of cardio you enjoy.
Duration: Start with easy endurance work and gradually increase the length of your workouts as you progress. Even if your goal race will have you in the saddle for several hours, don’t spend your entire off-season just pedaling slowly for hours at a time. “You want to show up on race day ready to race and excited,” says Wilpers. “But if you’re just doing endurance rides for 24 weeks, you’re going to get to the race and be like ‘I’m already over it.’” Instead, schedule two of your weekly sessions to be around an hour long and use that time to work on interval training, which will increase your pedaling power and endurance.
Intensity: Unlike frequency and duration, intensity is a bit subjective. How hard does your workout feel? If you plan for one ride per week to be low intensity, the other two (or three) should incorporate intervals at a higher intensity, which can include increasing your speed, shifting your cadence, and adding hill work.
Strength Training
You can build strength both on and off the bike.
On the bike, you can build strength with muscle tension or high-force intervals. Add an incline on the bike (or get into a higher gear) and take your cadence into the 50s or 60s, pedaling slowly “so you’re getting lots of muscle fiber activation,” says Wilpers. Try to hold that cadence and power for five to six minutes, building up to about 20 minutes. Muscle tension riding is great for building glute strength, something cyclists often neglect in favor of their quads and hamstrings. When you head back to higher cadence rides and sprints, this should make your pedal stroke even more efficient.
Off the bike, Wilpers suggests focusing on the “main movers”—the glutes, quads, and hamstrings—to increase force production on your pedals. Think: squats and deadlifts and cleans. Unilateral (single-leg) work will help ensure you’re building strength in both legs, rather than allowing one side to handle the bulk of the work. It can also help correct any muscular imbalances you may have developed during the racing season. For upper body work, add in bench presses, overhead presses, lat pull-downs, and rows.
Wilpers recommends at least two or three total-body strength sessions per week, depending on your training phase. During early base training, the addition of a third session can “help enhance strength improvements while your cycling training is just getting started,” he says. As your cycling training gets more demanding, decrease the volume and intensity of your strength workouts and switch to just two sessions per week to maintain the muscle you’ve built.
“A good indication that it’s time to dial back the strength training to strength maintenance is when you feel that residual fatigue and/or soreness from strength sessions is starting to interfere with your cycling training,” Wilpers says.
Rest and Recovery
Wilpers recommends at least one rest day a week, adding more based on how hard you’ve pushed yourself and your overall health and stress levels.
“Every athlete has a different rate of adaptation or absorption, and that will change as your life changes,” says Wilpers.
Rest doesn’t have to mean melting into the couch, though. You can use that time to focus on mobility work or do a low-impact workout you enjoy like yoga.
It’s tempting to assume that only professional athletes need dedicated rest days. But shifting your thinking about why and how you train may be the key to getting the most from your time on the bike and avoiding burnout.
“People say ‘I’m not an athlete.’ Well if you’re training, you’re an athlete,” says Wilpers.


