When it comes to fitness trends, few have as low of a barrier to entry as rucking. The popular exercise (which has millions of posts using #rucking on TikTok and Instagram) requires only that you have a backpack, some things to stash in it, and a place to walk. In fact, if you have ever gone on a backpacking trip, taken the long way home from the store with your groceries on your back, or slung your child’s book bag over your shoulders while walking them to and from school, you’ve already rucked.
Like many fitness movements (boot camp classes, CrossFit), this one has its origins in the military. Army recruits embark on long marches with heavy rucksacks as part of their training regimen.
For the rest of us, weighted walking is a low-impact way to build strength and endurance, explains Sean Blinch, a Toronto-based CrossFit coach and gym owner who has been rucking for five years. Both beginner-friendly and scalable for advanced athletes, the combination of cardio and resistance training will primarily work your legs, core, and back.
It’s also something you can do with limited time. “We can find so many reasons not to move,” Blinch says. “Everyone’s time-poor. Nobody has enough time for anything.” With rucking, “you don’t have to warm up or cool down—just put on the backpack and go out,” he adds.
Many people suffer from posture-related issues, too, especially individuals who spend a lot of time sitting at a desk. Rucking may help to correct some of those concerns. The weighted pack can help pull your shoulders back, mitigating some of the effects of upper crossed syndrome, a condition characterized by tightness and weakness in the muscles of the neck, upper back, and shoulders, Blinch says.
Being sedentary takes a toll on our lower body as well. When we are seated for long periods of time, our body begins to adapt to that position, tightening the hip flexors. That can weaken the hips over time, making exercise and daily movements uncomfortable or painful, and this can get worse as we age. When you walk, however, “you have your hip in a very natural, open position,” Blinch says.
What You Need to Ruck
Picking up rucking is as easy as lacing up a pair of shoes, putting on a weighted backpack, and heading out the door. Brands like GORUCK sell special packs just for rucking, but any daypack with durable, padded straps will also work. To add weight, you can use household items like dumbbells, canned goods, and books. Wrap your items in a towel to avoid any hard edges digging into your back as you walk. A weight plate will distribute the load more evenly across your back.
Weighted vests—which distribute weight equally around your torso—are also an option. As Outside columnist Alex Hutchinson has written, it’s easier to maintain a normal posture and gait with a vest than a backpack, since you don’t need to lean forward to resist the weight behind you. You will also likely burn less energy (that is to say, calories) with a vest.
Whether you choose a vest or a backpack, make sure that your footwear gives you enough support and stability. Blinch recommends lacing up a pair of shoes that you would use for distance running.
Finally, while rucking on a trail can offer an added challenge to your stability and core strength, as well as the emotional benefits of being in nature, you can ruck on city or suburban streets too. It’s less about getting it “right” and more about getting time outdoors, on your feet, away from a screen or desk. Ideally, you’ll enjoy it, too.
“Rucking should fit into your life in the ‘I get to do this’ area,” Blinch says.
Choosing a Weight
For your first time, Blinch recommends going easy. In terms of weight, that might look like loading either five or ten percent of your body weight into a pack. For a 160-pound person, that would be between eight and 16 pounds. If you’re already active and experienced with both strength and cardio, you can start with 15 to 25 percent of your body weight (between 25 and 40 pounds, for that 160-pound athlete).
Choosing a Distance
Beginners or less active individuals should start with one mile, or about 15 to 20 minutes of walking if you’re going by time rather than distance. Active individuals can start with about 30 minutes. Blinch recommends adding distance to your rucks before increasing weight.
When in doubt, determine your distance or weight by your rate of perceived exertion. In general, aim for a pace that’s somewhere between a stroll and a brisk walk. “If it feels punishing, you’re either going too far or too heavy,” Blinch says. “It should almost always feel like this is leaning on the side of easy.”
How Often Should You Ruck?
You can fit rucks into your existing schedule in a way that feels natural and low-pressure. Blinch suggests two or three rucks a week, but notes that they can also be part of your daily routine rather than a separate workout you need to carve out time to accomplish. You can turn a series of errands into a ruck by bringing an empty pack, loading your purchases into it, and walking back home.
How Heavy Is Too Heavy?
If you don’t have a rucking race or event in mind, determining when to max out can be confusing. One popular rule of thumb is to stick to a weight that allows you to cover a mile in under 20 minutes (army standard is 15 minutes). If it’s taking you longer than that, consider dropping weight. Another general suggestion is to stick to loads that do not exceed one-third of your body weight.
Keep It Casual
Though it can be tempting to go as hard and as far as possible, Blinch recommends increasing the demand on your body slowly, bumping up your weight or distance by about ten percent each week.
“With rucking, less is more,” Blinch says. “So you should be thinking about taking the intensity out. The benefits really come without all the intense stuff added into it.”
Try These Rucking Workouts
To add variety to your rucks, here are two workouts Blinch recommends:
Strength and Interval Training
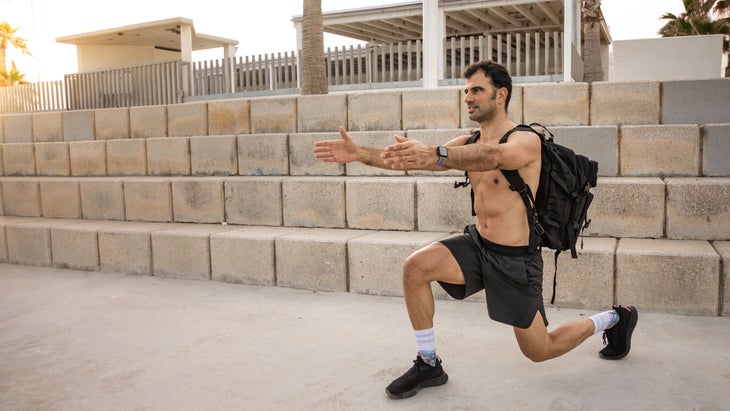
Warm-up: Five to ten minutes of walking with no weight to get the blood flowing.
Workout: Walk for five minutes with a weighted pack. Stop and perform ten lunges or squats with the pack on your back. Repeat for four rounds.
Cool Down: A few minutes of walking without weight, followed by some light stretching that focuses on your calves, hamstrings, and lower back.
A Hill Workout
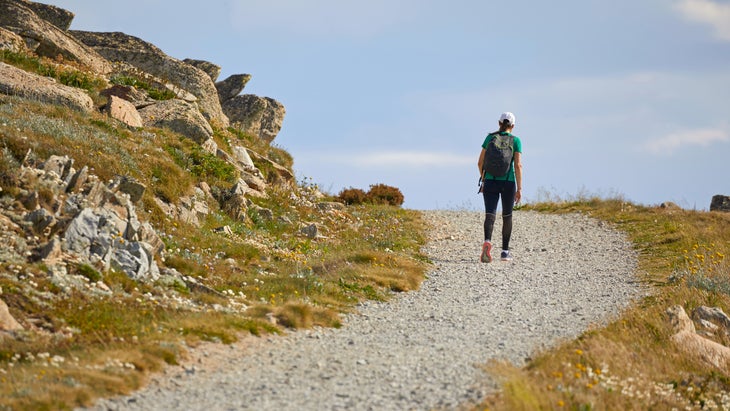
Warm-up: Start with a brisk five-minute walk, no weight, and do a few dynamic stretches.
Workout: Ruck for a total of 20 to 30 minutes, choosing a route with hills. On uphill sections, shorten your stride length and maintain a slightly forward-leaning posture for balance. Alternate between a faster pace for two minutes and a slower, steady pace for one minute.
Cool Down: End with five minutes of walking, without the pack, and stretch out your calves, quads, and hips.
Source link


